Tired of generic template characters that make every video look the same? Whether you’re creating for social media, brand promotion, or storytelling shorts, repetitive visuals dilute your unique style and make your content forgettable.
By using your own character, you can align with your channel’s tone, enhance storytelling consistency, and instantly build visual recognition that makes your content stand out.
In this step-by-step practical guide, we’ll walk you through how to use Videoniu to create custom characters for AI video generation — even complete beginners can follow along easily!
👩🏻👨🏻 [Character] Feature Overview
❓ Are you struggling to keep character consistency across your AI-generated videos? ❗ With our AI video generation tool Videoniu, that problem is finally solved!
Videoniu includes a dedicated Character Assets, where you can freely save and manage your character designs. Once you define your characters in your AI story, Videoniu automatically generates characters that stay visually consistent throughout the entire video!
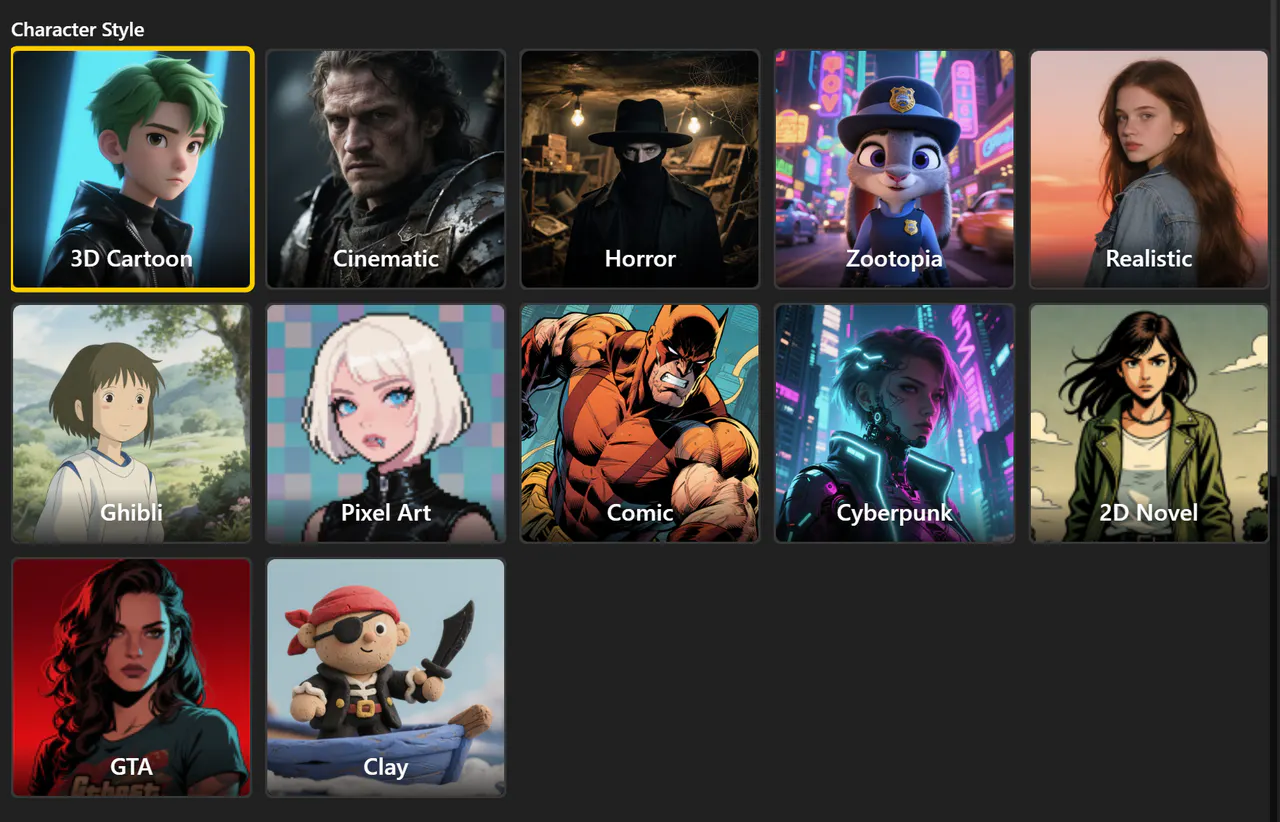
You can choose from various pre-designed character styles in the Character Options section:
🔍 Where to Find Character Creation
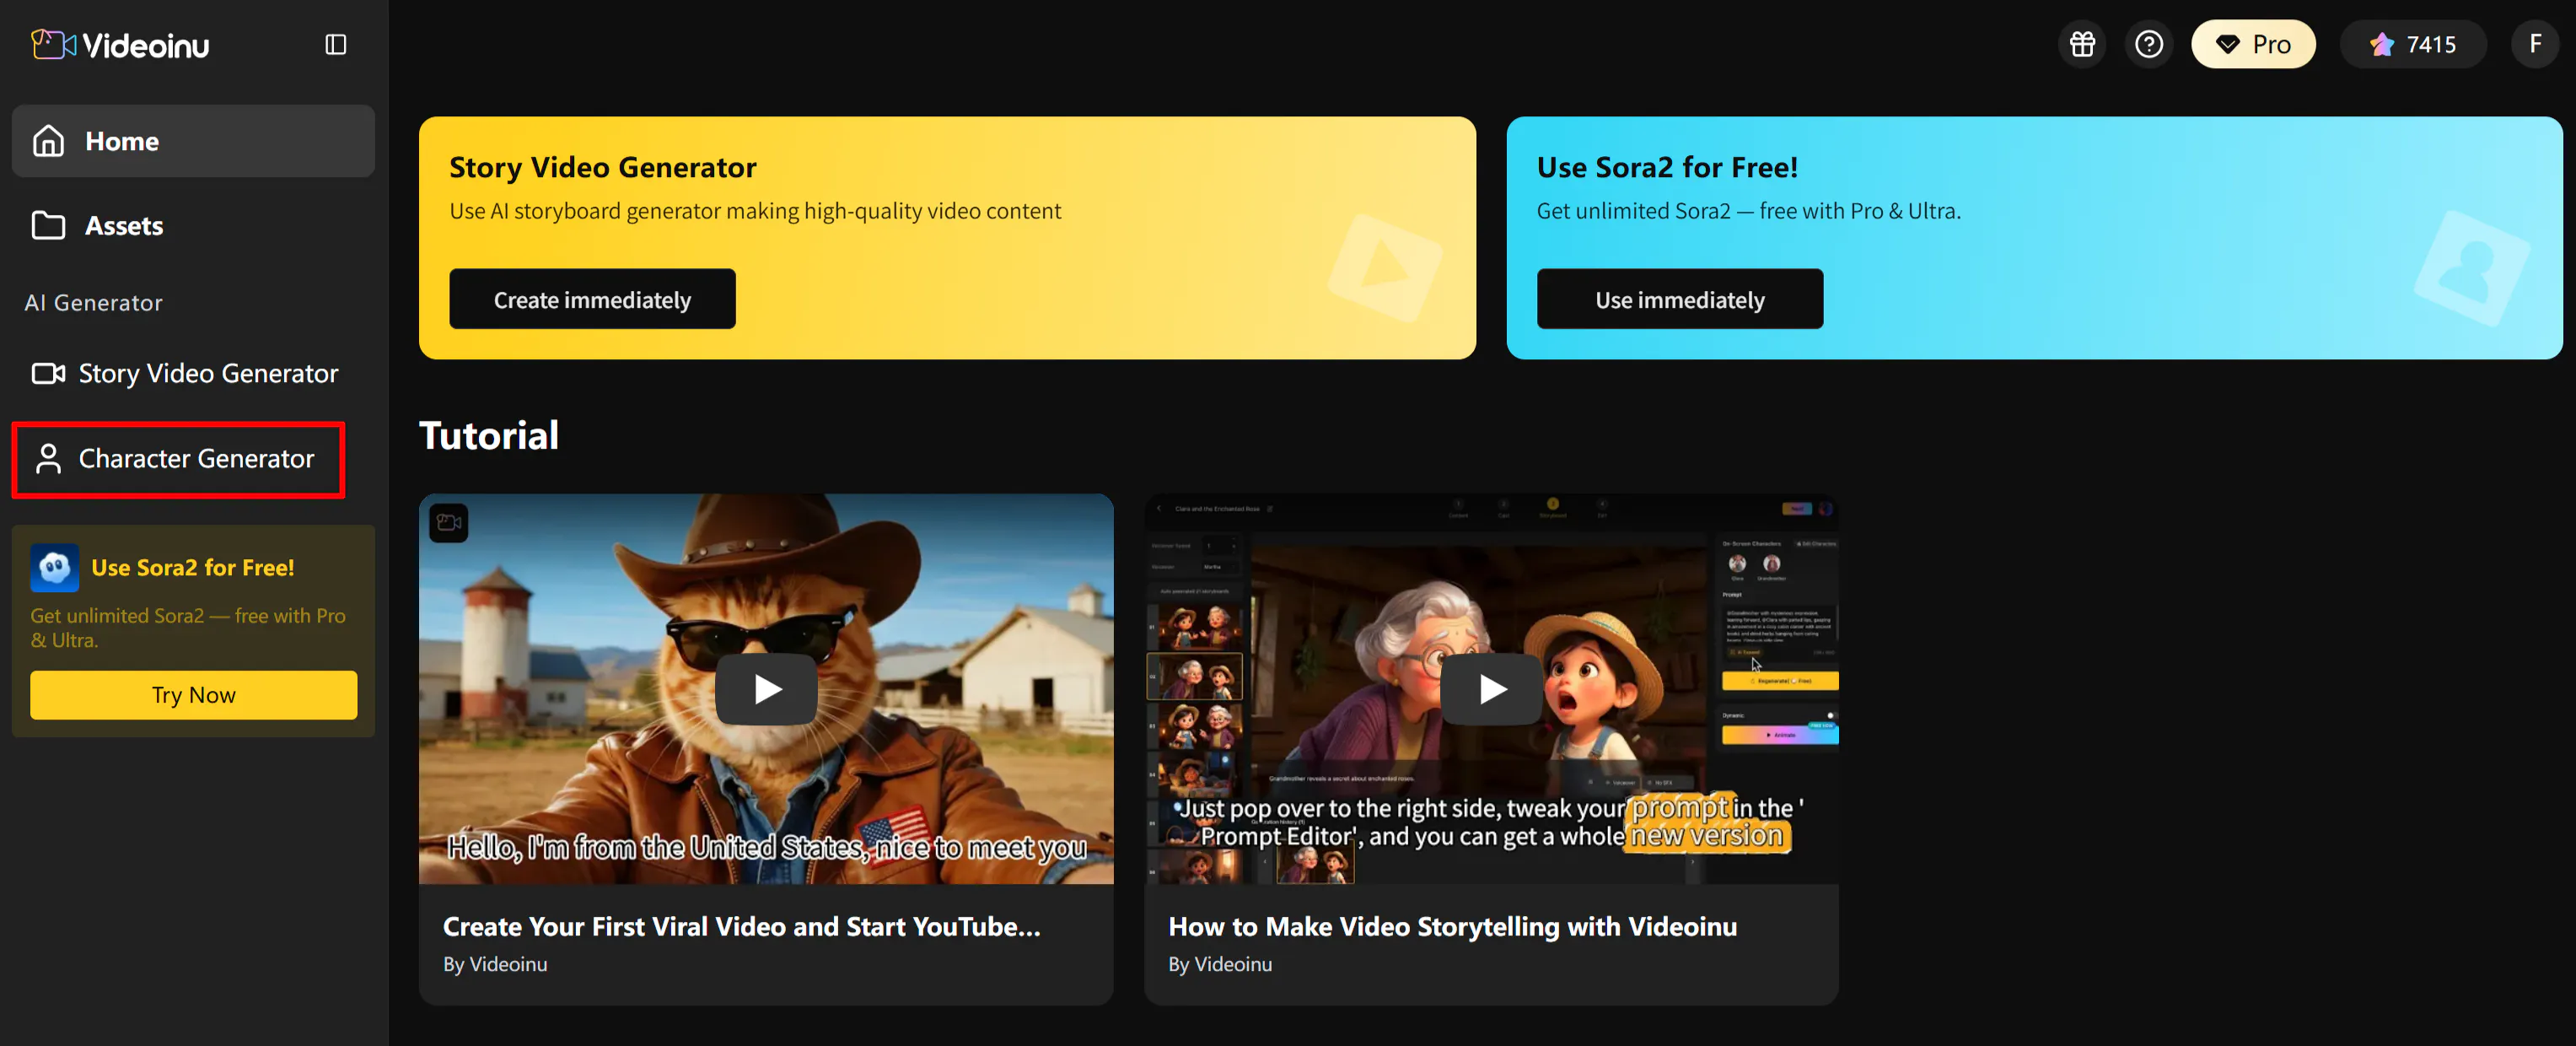
You can access the Character Creation function in three places:
· Character Generator/👇
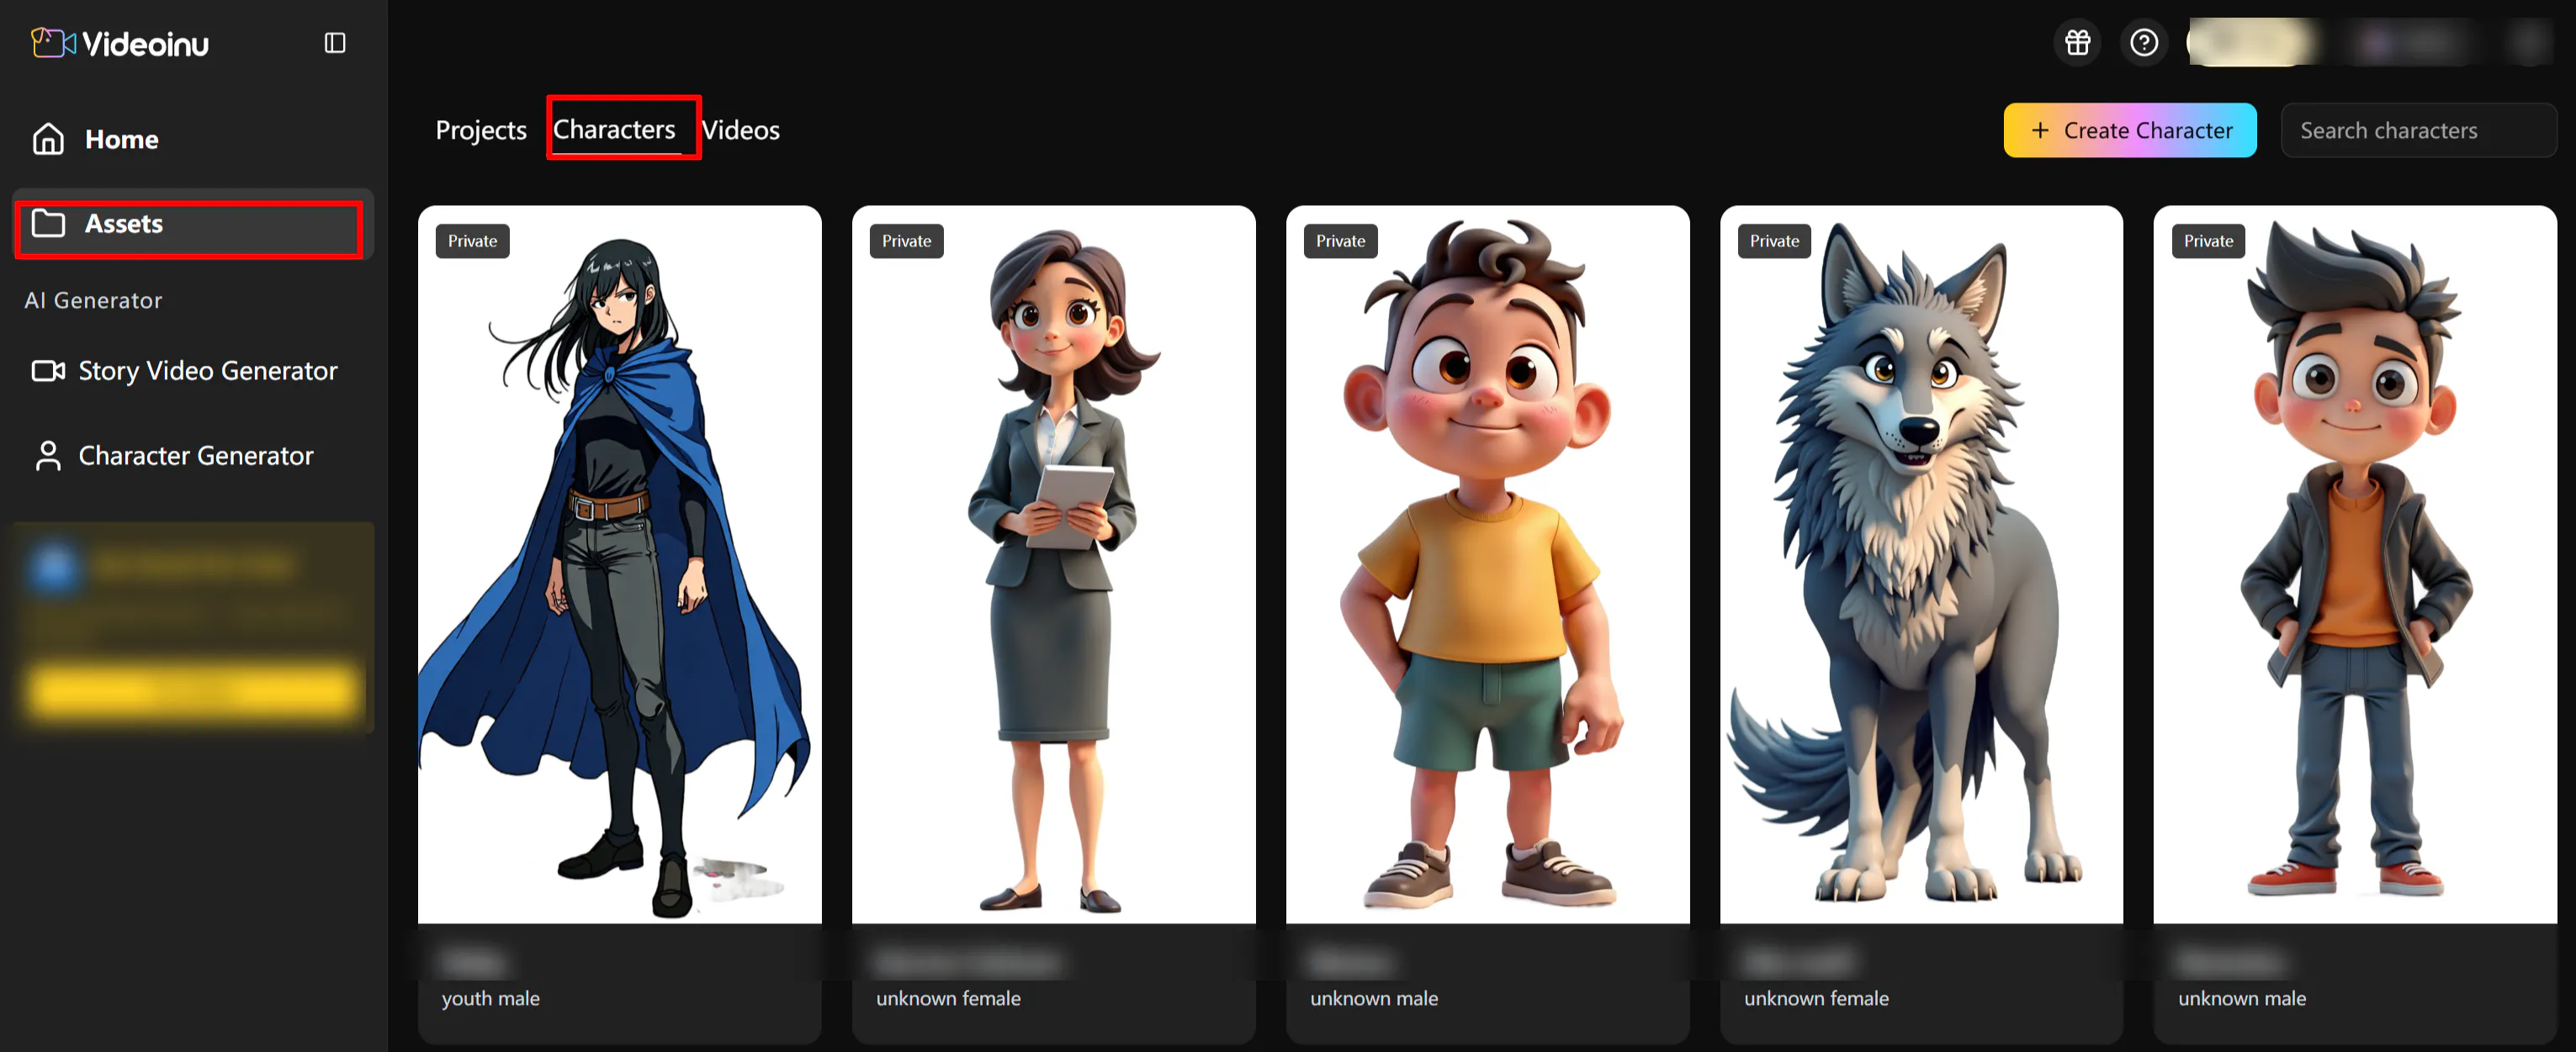
· Assets-My Characters/ 👇
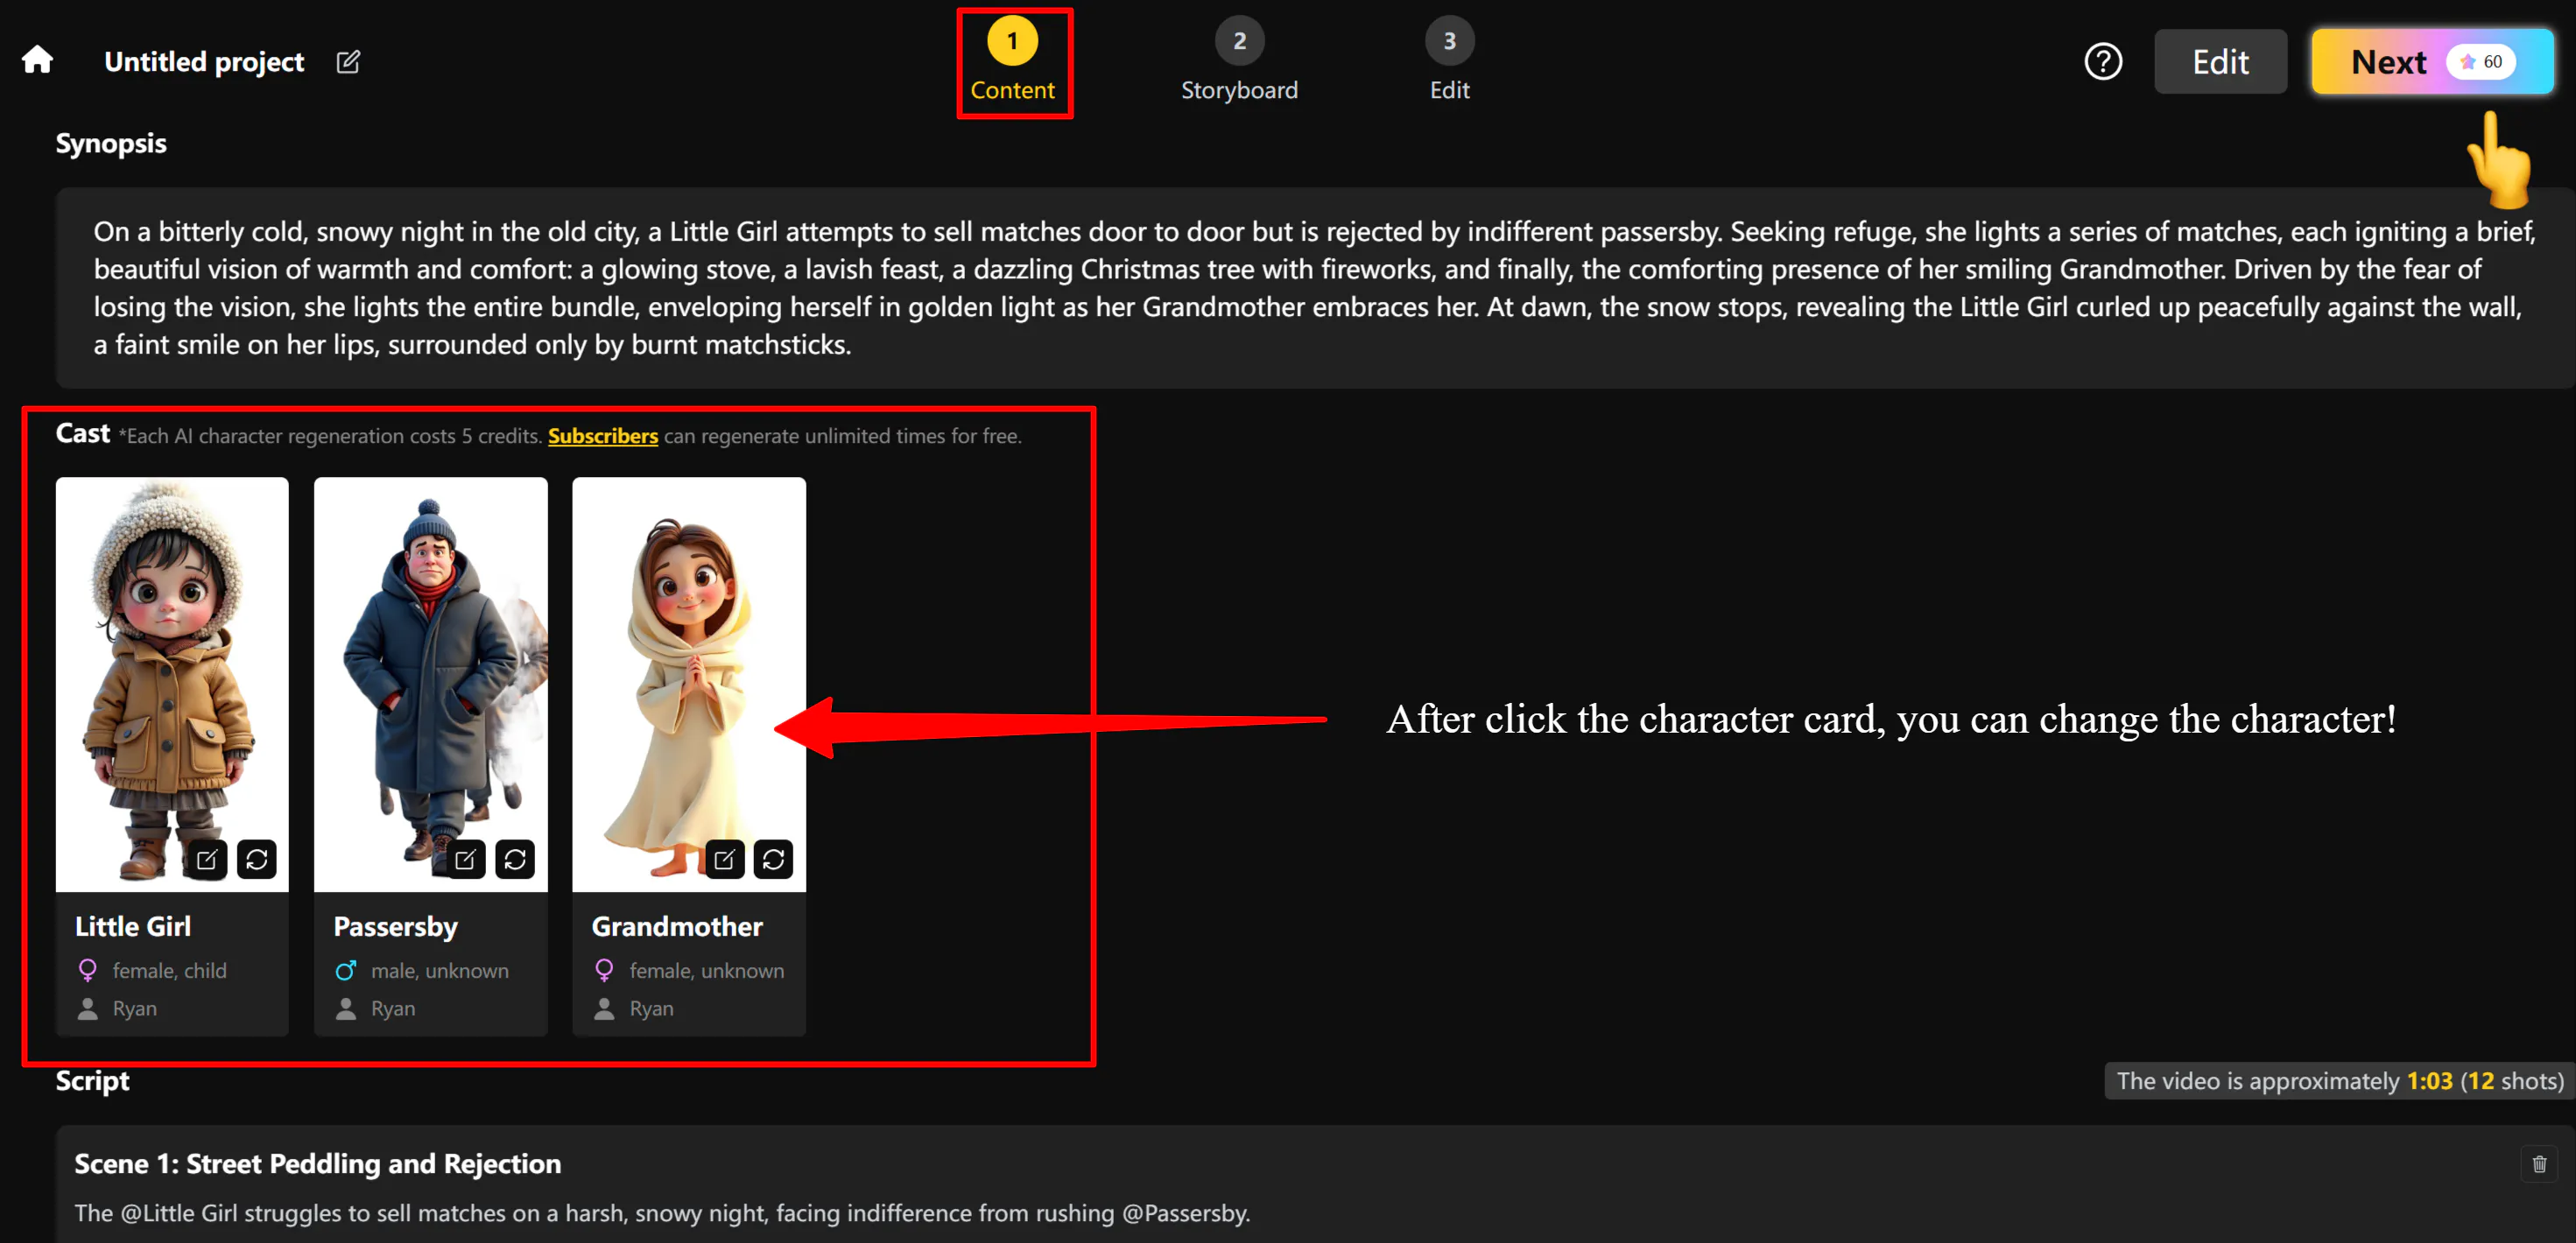
· Story Video Generator-content-Cast/👇
🔨 Preparation: Build Exclusive Virtual Character Assets to Boost Video Visibility
→ If you’re just exploring or testing the feature, you can skip this part!
However, if your goal is to monetize your AI content, grow exposure on social media, or build a recognizable virtual persona, then professional character design is essential.
To ensure your virtual character both meets creative needs and attracts your target audience, here’s the detailed checklist you should complete before creating your “signature character.” ✨
- Define Your Character’s Positioning and Use Case
Before starting the design, clarify your character’s purpose and target scenario. A clear positioning helps you plan how to use the character effectively across different types of content.
- Purpose Definition: Decide your main objective — are you building a personal IP image, a brand virtual ambassador, or a character for story-based content? Each use case influences your design style and performance requirements.
- Core Needs: Based on your purpose, define your character’s style, expression range, and application scenarios. Key points include:
- Style: Choose from 3D cartoon, realistic, or comic-style visuals depending on your audience.
- Application Scenarios: Plan how your character will appear on different platforms — livestreaming, talking-head videos, or short-form storytelling — as this determines tone and look.
- Prepare Character Assets
Well-prepared assets are the foundation of a high-quality virtual character. Great visuals help improve your content instantly and boost visibility on social platforms.
- Image Assets: Prepare front and side images of your character. Ensure clothing, hairstyle, and details are clear and unobstructed. This helps generate more realistic renderings.
- Text Assets: To express your character perfectly, you can use tools like ChatGPT or Gemini to polish character descriptions. Of course, you can keep adjusting prompt details during the creation process until you’re fully satisfied.
💡 Core Features and Steps
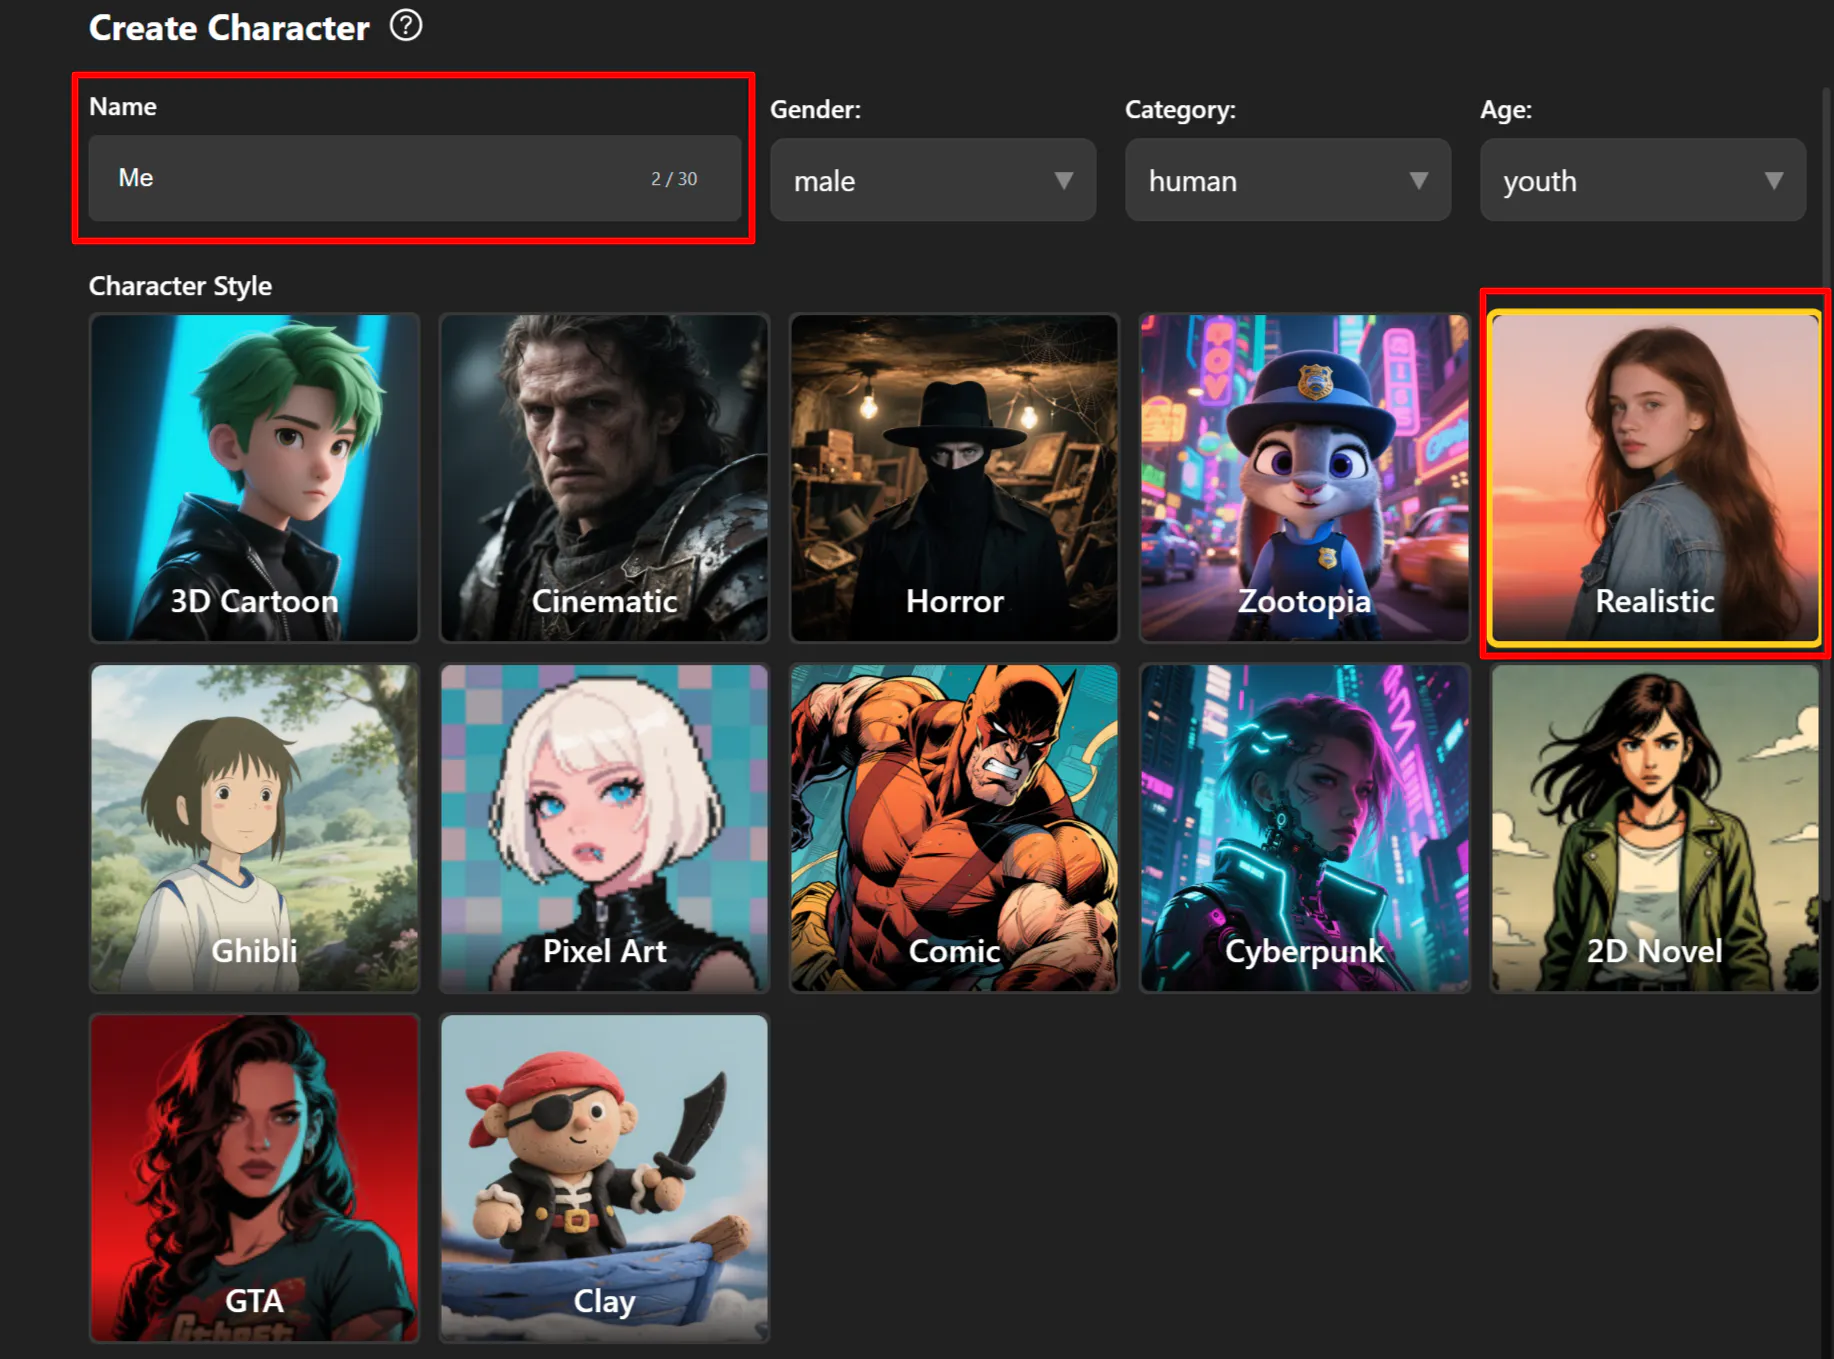
Character Generator
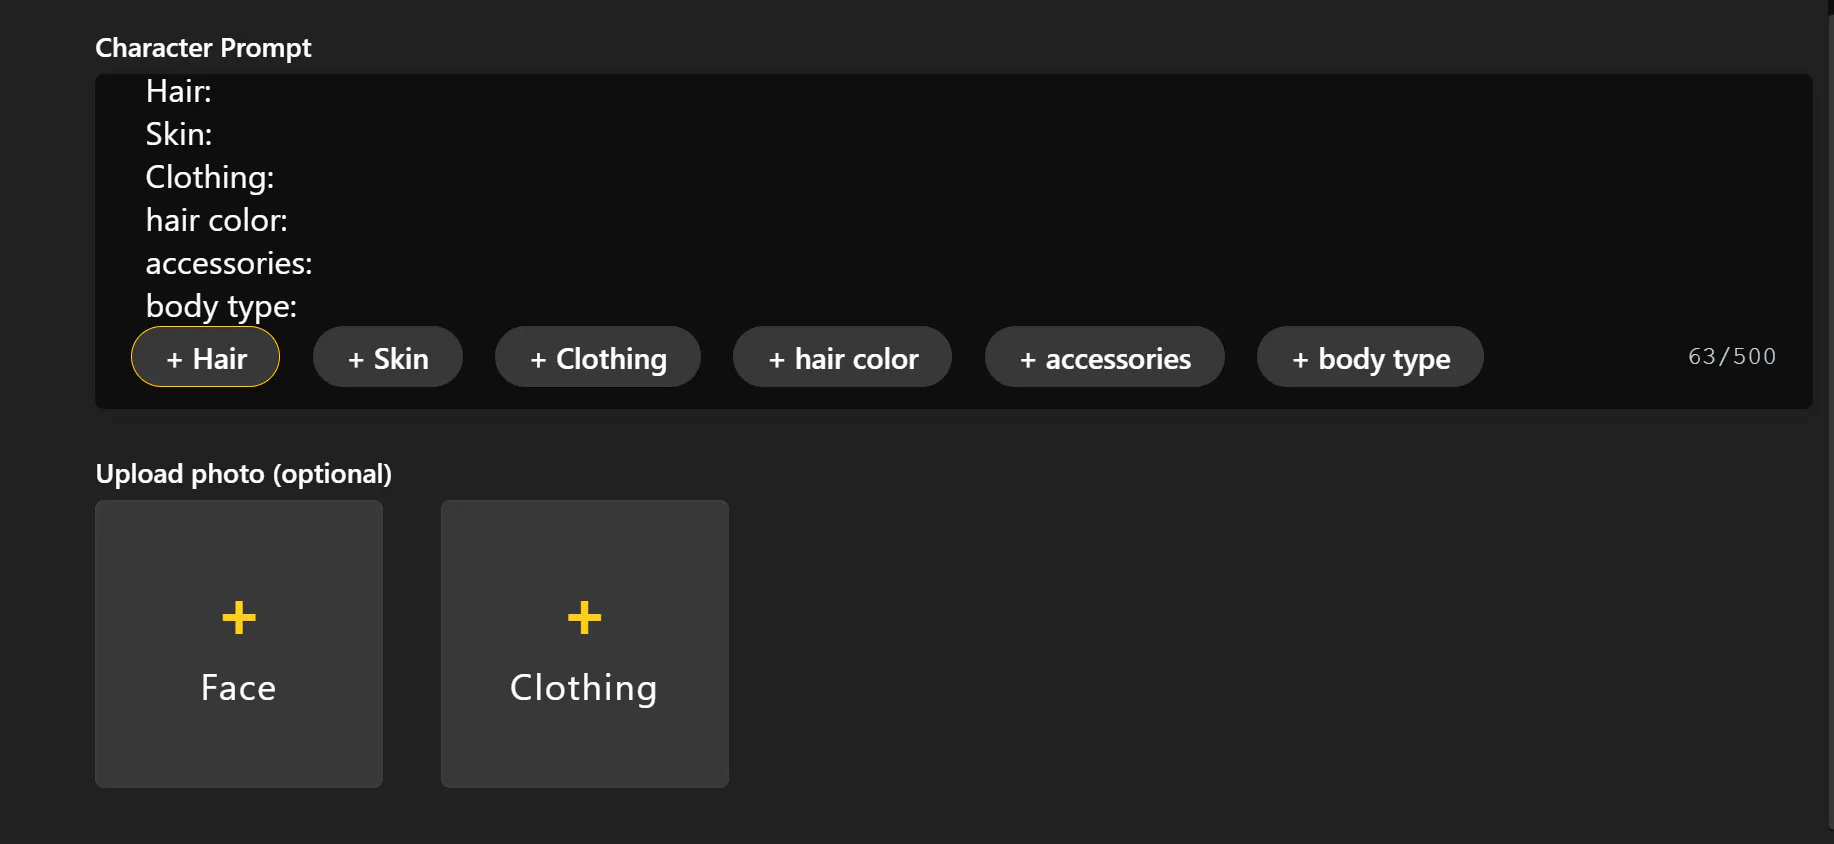
- Start by giving your character a unique name and fill in the basic info. Don’t skip this step — otherwise, the system can’t generate or upload your character image

- After choosing a style, proceed to the Character prompt input section. You can either type your own detailed description or select from our preset prompt options. You can also Upload photo as a reference to guide the AI in refining your design.
- ⚠ Remember: Your generated character will follow the present style, not the style of your uploaded image.
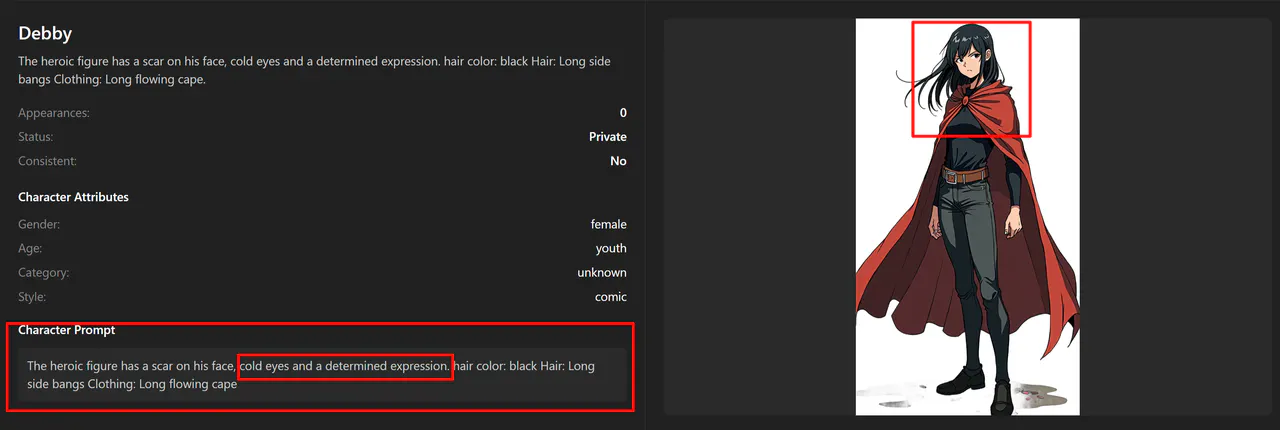
- To enhance personality, add small expression details in your prompt — for example:
cold eyes and a determined expressionThis will give your character a cool, strong appearance.
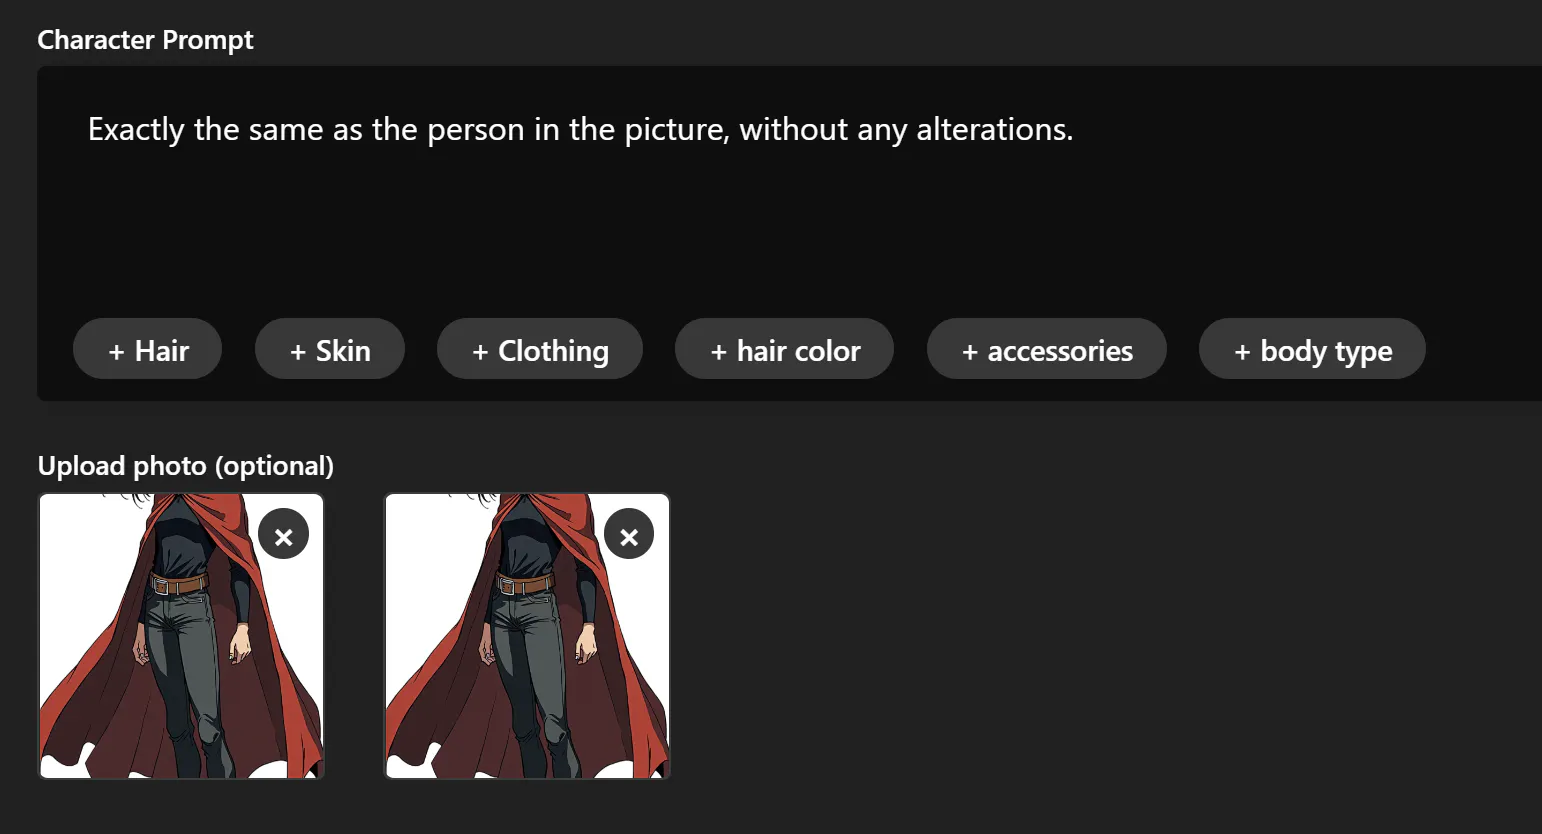
- You can also generate using your own prepared character images. Simply upload your reference and type:
Exactly the same as the person in the picture, without any changes.
- Finally, click [Generate Image] to preview your character! You’ll see all previously generated versions on the same page. If you’re not happy with the result, click [Edit] to go back and re-generate.
Assets → My Characters
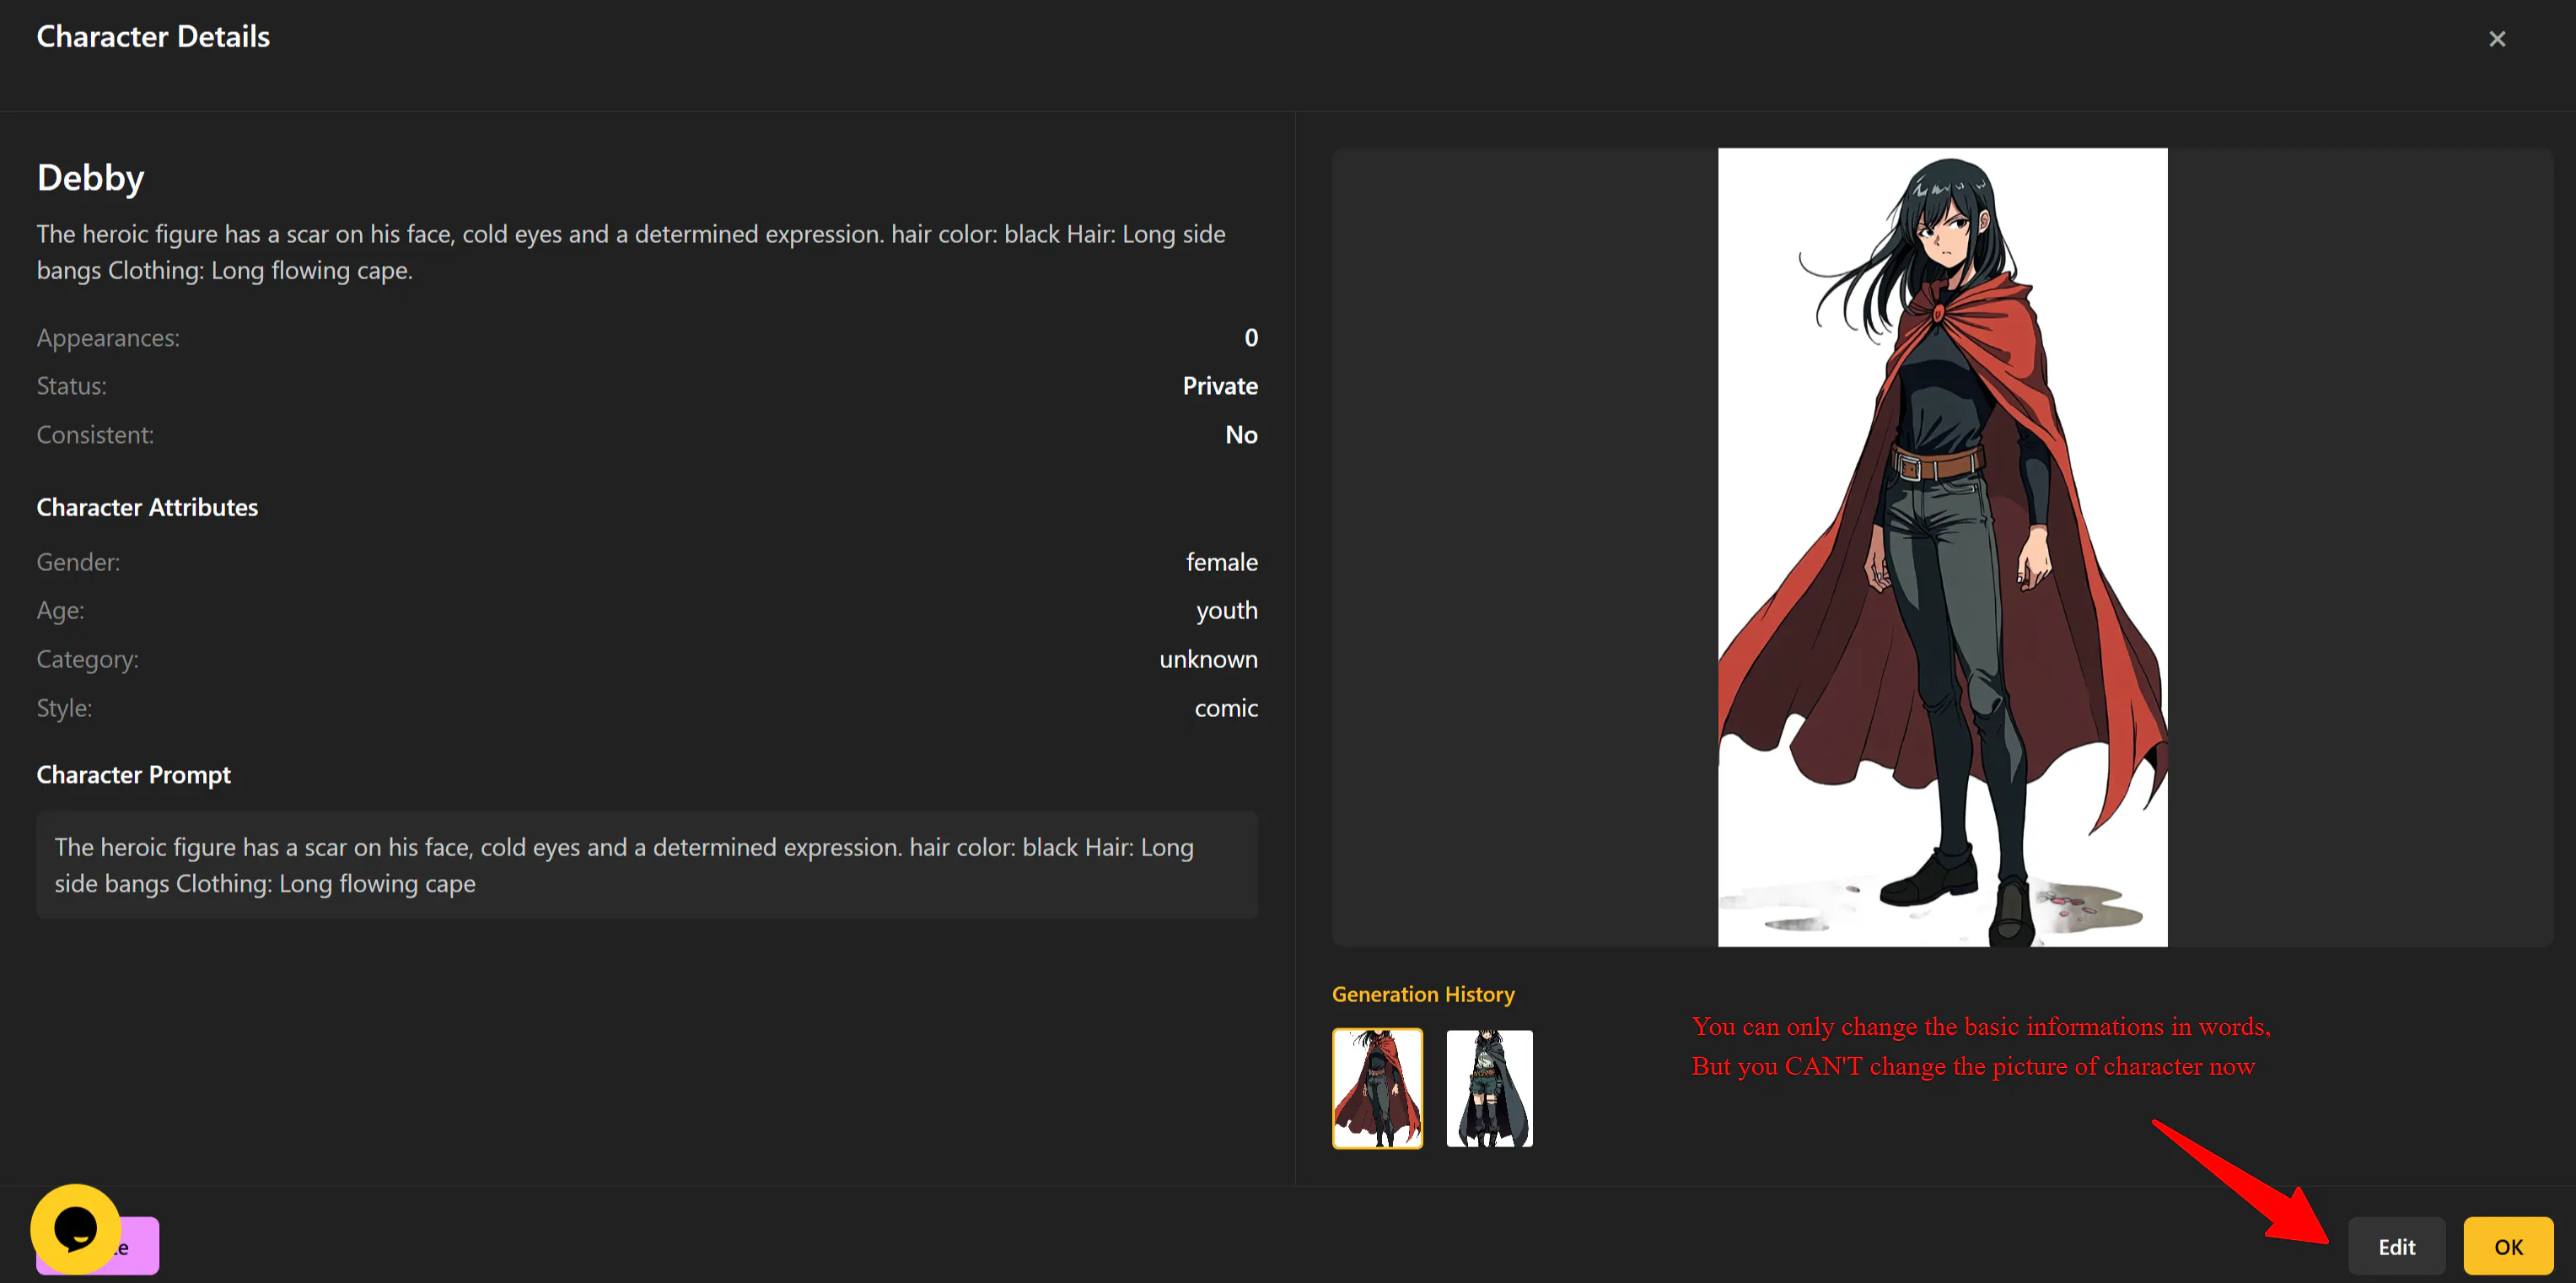
- Under My Characters, you’ll find all your past creations in one place. You can review, rename, or edit their prompts anytime.
- ⚠ Note: editing here only changes names and prompts, not the visual design itself. To modify appearance, create a new character.
- To delete a character, open its card and click Delete.
💡 Tip: All previously created characters are saved in your character library. When starting a new video, you can reuse them — just make sure your character’s style matches the chosen script’s visual style.
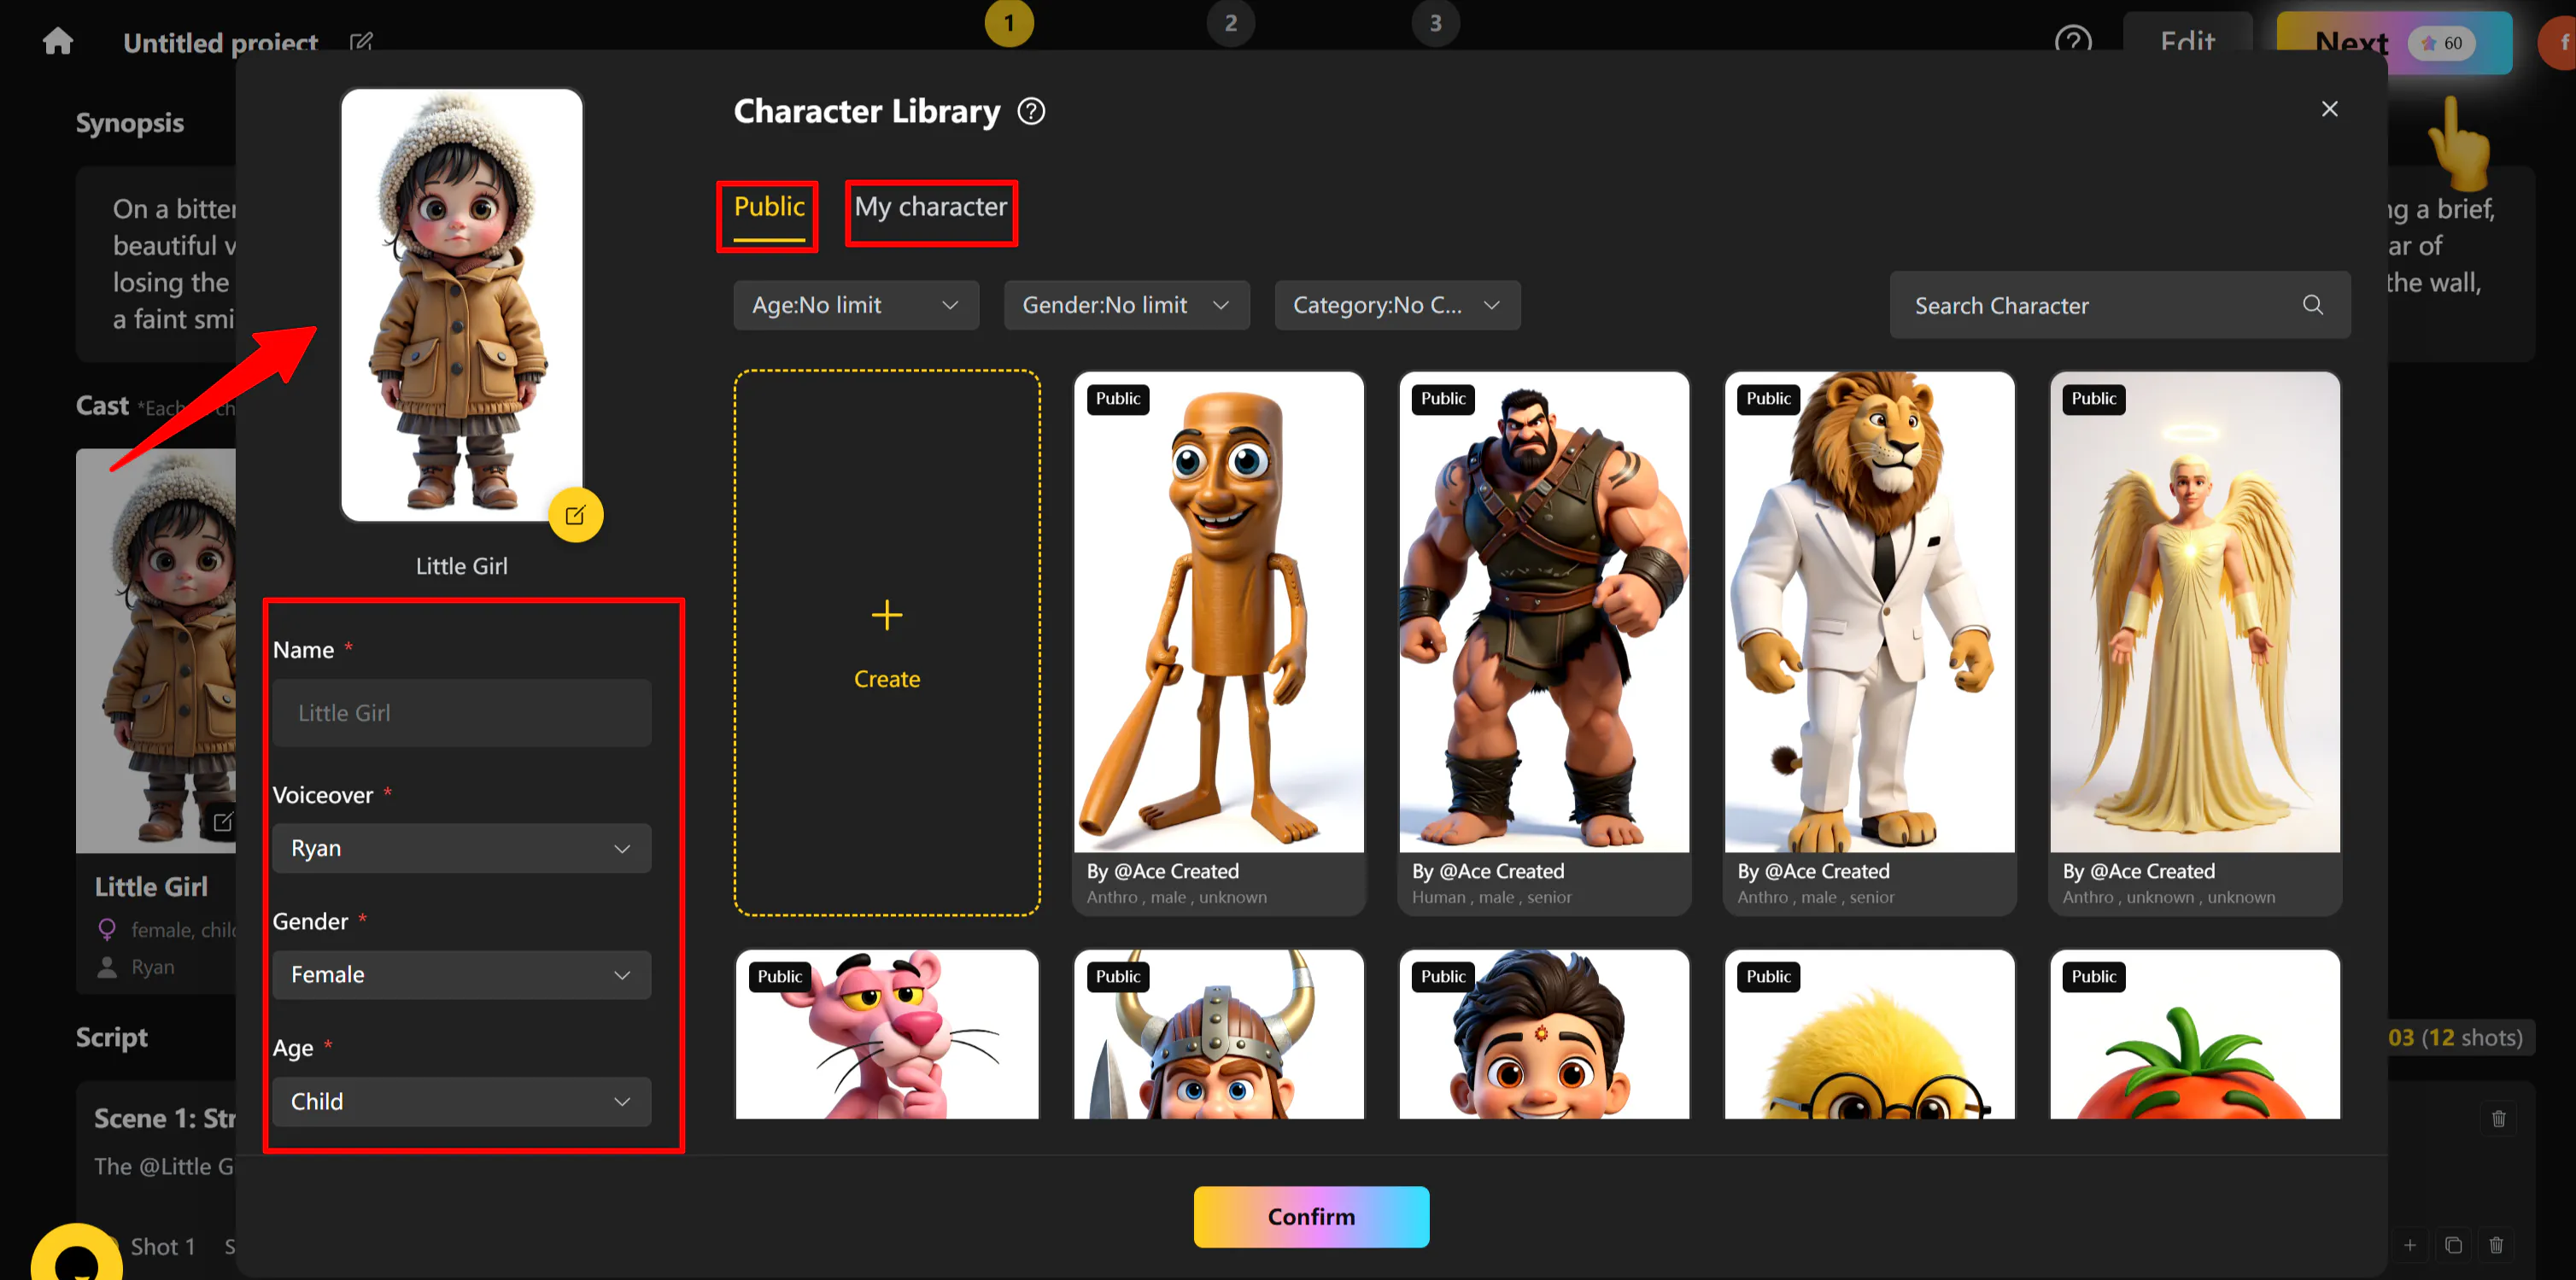
Story Video Generator → Content → Cast
During AI video creation, you can also directly add or swap characters from your library! Once your script is generated, go to Cast, and simply replace any role with your chosen character — it’s that easy!
🎁 Bonus Tips: More Fun Ways to Use AI Characters
How to Remix or Redesign My Characters?
· I want to change my character’s style!
Of course! Just take a screenshot of your character and reselect a new style.
Example: To transform a 2D comic character into a 3D version, follow three quick steps:
1️⃣ Create a new character
2️⃣ Choose your new style
3️⃣ Upload your reference image and write this prompt:
Exactly the same as the person in the picture, without any changes.
In just three steps, you’ll get the same character in a brand-new style — perfectly consistent and incredibly realistic. If that sounds exciting, try it now! ❤
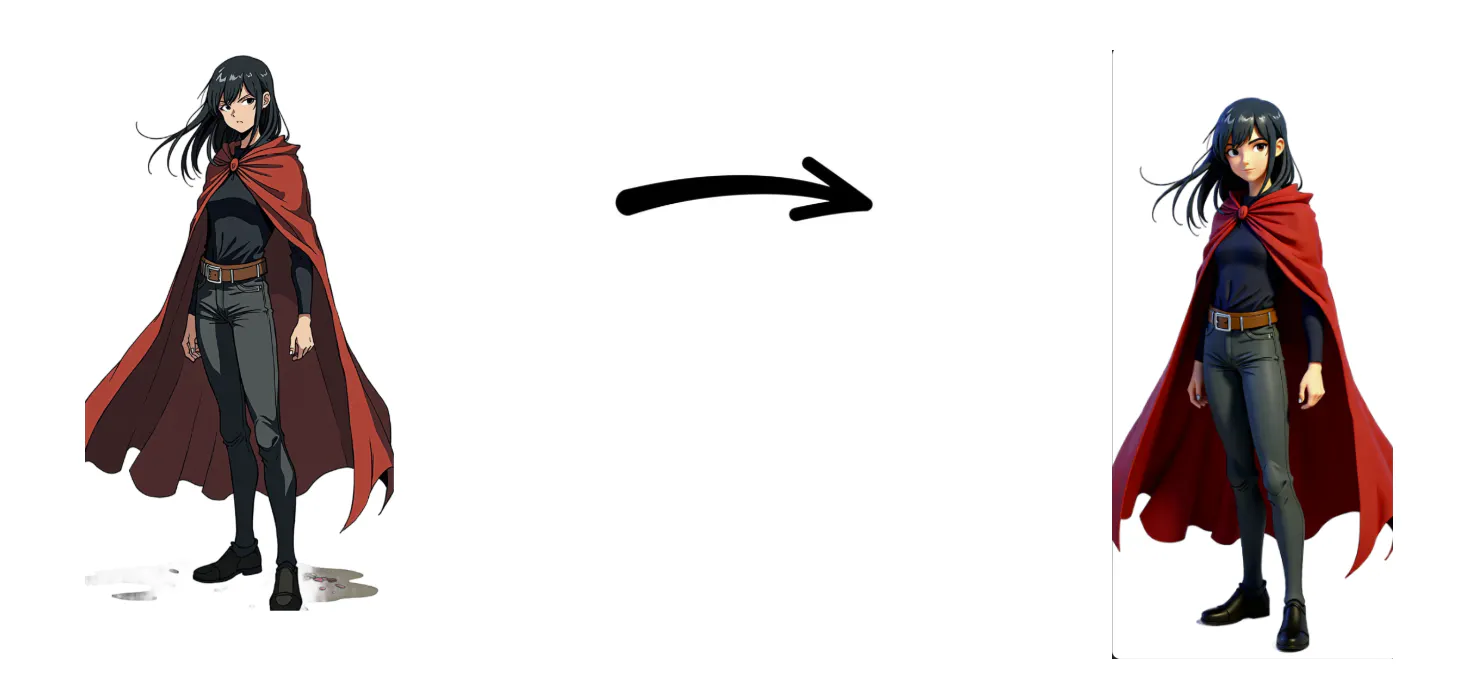
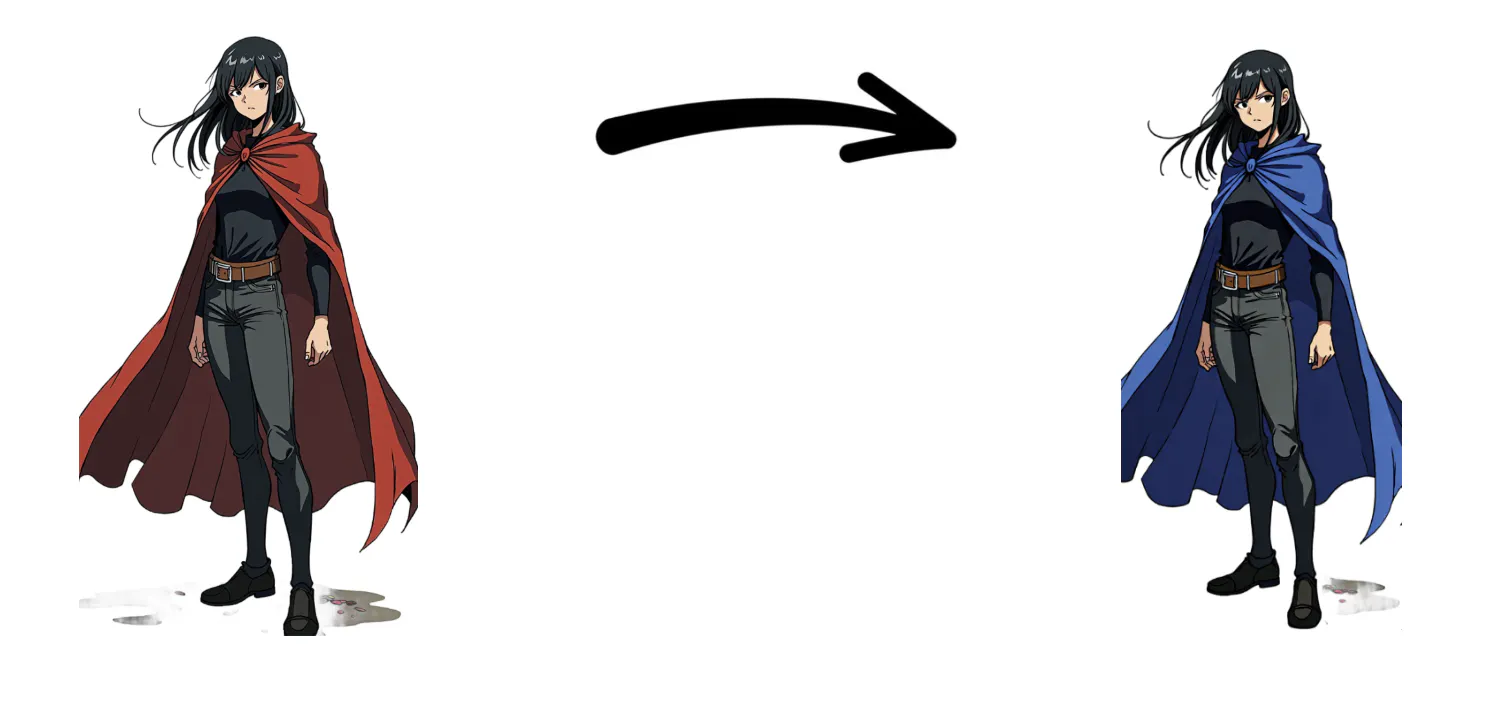
· I want to change my character’s appearance!
Absolutely! Just save a screenshot of your character and re-enter a new prompt.
Example: To change your character’s cape color to blue, simply:
1️⃣ Create a new character
2️⃣ Choose the same style
3️⃣ Upload your reference image and type:
ex.: Change the character's cape to blue, and make no other alterations.
· I want to turn myself into a character!
Definitely possible — and the process is almost identical!
Choose a realistic style, upload your own photo, and describe in the prompt: No changes needed for the person in the picture.
Of course, you’re not limited to realistic style — feel free to explore other styles and generate creative characters of yourself!
Once your personal AI character is ready, go ahead and enjoy creating freely!⛵